Git supports branching, which allows you to do multiple parallel changes to the content of a repository.
A Git branch is simply a named label pointing to a commit. The HEAD label indicates which branch you are on. Git creates a branch named master by default. When you add a commit, it goes into the branch you are currently on, and the branch label (together with the HEAD label) moves to the new commit.
Given below is an illustration of how branch labels move as branches evolve.
- There is only one branch (i.e.,
master) and there is only one commit on it.
- A new commit has been added. The
master and the HEAD labels have moved to the new commit.
- A new branch
fix1 has been added. The repo has switched to the new branch too (hence, the HEAD label is attached to the fix1 branch).
- A new commit (
c) has been added. The current branch label fix1 moves to the new commit, together with the HEAD label.
- The repo has switched back to the
master branch.
- A new commit (
d) has been added. The master label has moved to that commit.
- The repo has switched back to the
fix1 branch and added a new commit (e) to it.
- The repo has switched to the
master branch and the fix1 branch has been merged into the master branch, creating a merge commit f. The repo is currently on the master branch.
Follow the steps below to learn how to work with branches. You can use any repo you have on your computer (e.g. a clone of the samplerepo-things) for this.
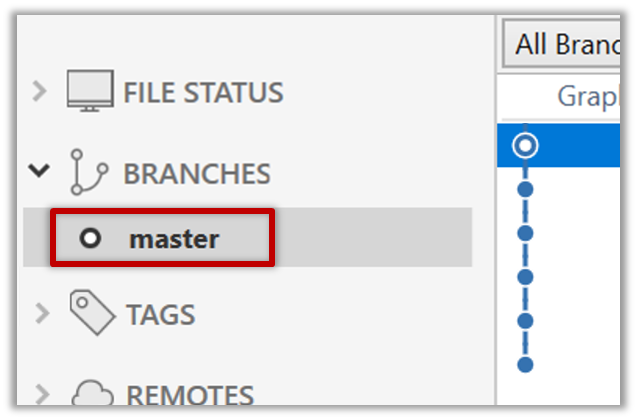
0. Observe that you are normally in the branch called master.
SourceTree
CLI
git status
on branch master
1. Start a branch named feature1 and switch to the new branch.
SourceTree
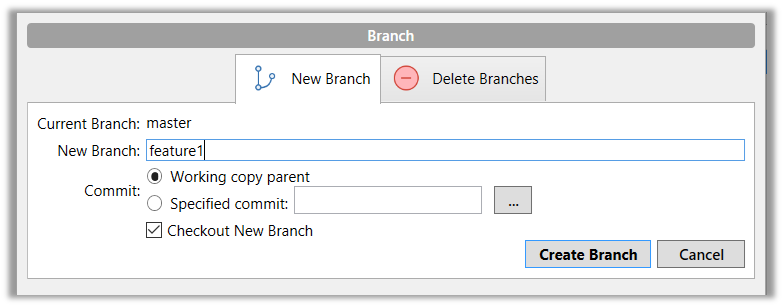
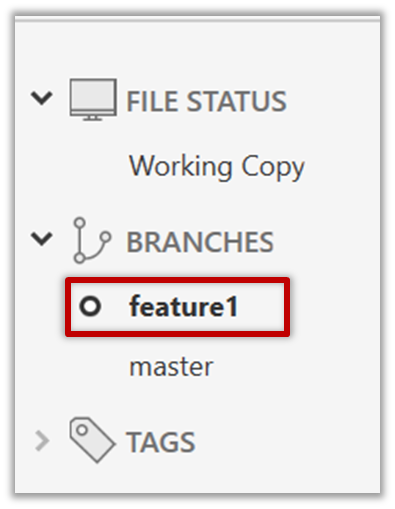
Click on the Branch button on the main menu. In the next dialog, enter the branch name and click Create Branch.
Note how the feature1 is indicated as the current branch.
CLI
You can use the branch command to create a new branch and the checkout command to switch to a specific branch.
git branch feature1
git checkout feature1
One-step shortcut to create a branch and switch to it at the same time:
git checkout –b feature1
2. Create some commits in the new branch. Just commit as per normal. Commits you add while on a certain branch will become part of that branch.
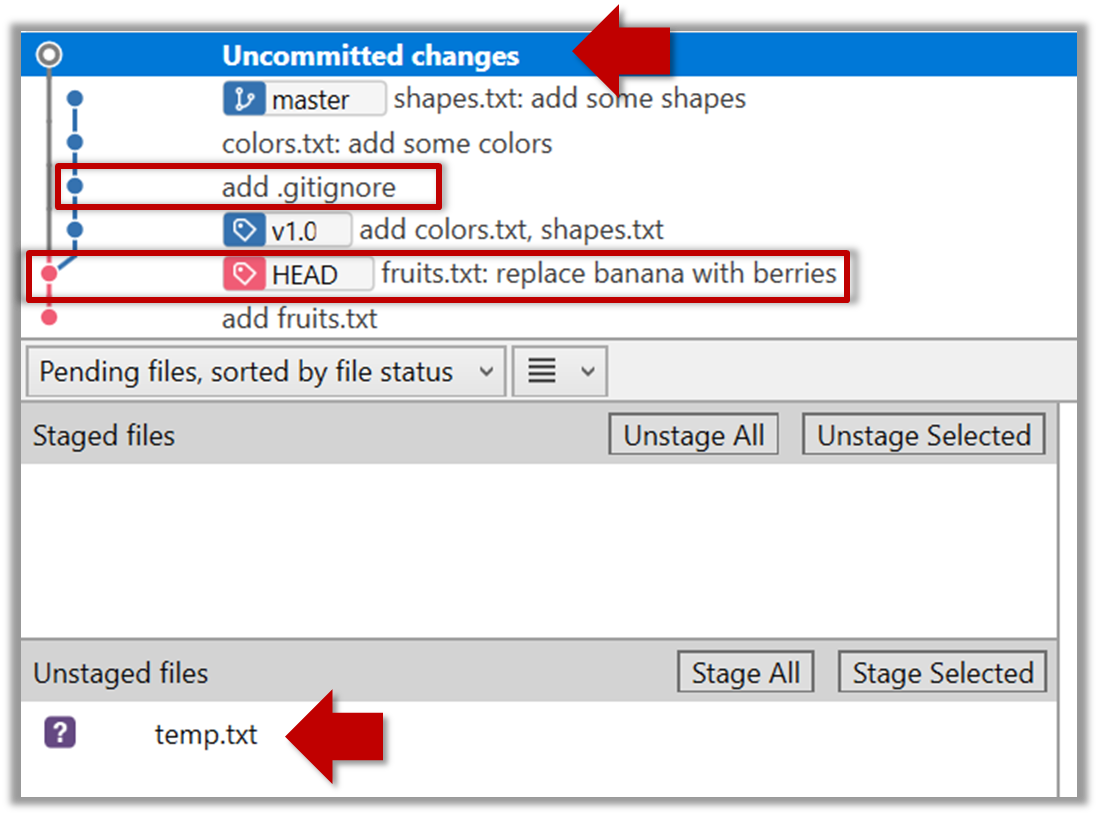
Note how the master label and the HEAD label moves to the new commit (The HEAD label of the local repo is represented as in SourceTree).
3. Switch to the master branch. Note how the changes you did in the feature1 branch are no longer in the working directory.
SourceTree
Double-click the master branch.

CLI
4. Add a commit to the master branch. Let’s imagine it’s a bug fix.
To keep things simple for the time being, this commit should not involve the same content that you changed in the feature1 branch. To be on the safe side, this commit can change an entirely different file.

5. Switch back to the feature1 branch (similar to step 3).
6. Merge the master branch to the feature1 branch, giving an end-result like the following. Also note how Git has created a merge commit.
 SourceTree
Right-click on the master branch and choose merge master into the current branch. Click OK in the next dialog.
CLI
The objective of that merge was to sync the feature1 branch with the master branch. Observe how the changes you did in the master branch (i.e. the imaginary bug fix) is now available even when you are in the feature1 branch.
Instead of merging master to feature1, an alternative is to rebase the feature1 branch. However, rebasing is an advanced feature that requires modifying past commits. If you modify past commits that have been pushed to a remote repository, you'll have to force-push the modified commit to the remote repo in order to update the commits in it.
7. Add another commit to the feature1 branch.
8. Switch to the master branch and add one more commit.
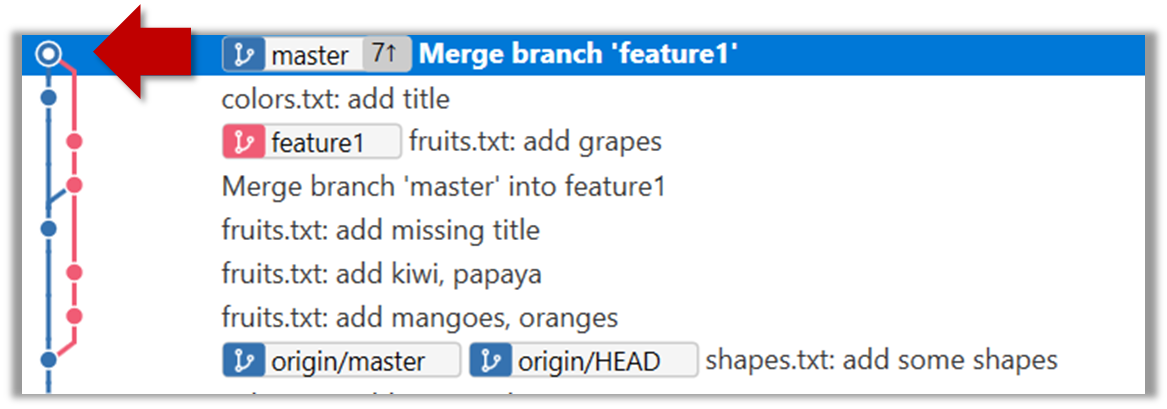
9. Merge feature1 to the master branch, giving and end-result like this:
 SourceTree
Right-click on the feature1 branch and choose Merge....
CLI
git merge feature1
10. Create a new branch called add-countries, switch to it, and add some commits to it (similar to steps 1-2 above). You should have something like this now:

Avoid this common rookie mistake!
Always remember to switch back to the master branch before creating a new branch. If not, your new branch will be created on top of the current branch.
11. Go back to the master branch and merge the add-countries branch onto the master branch (similar to steps 8-9 above). While you might expect to see something like the following,

... you are likely to see something like this instead:

That is because Git does a fast forward merge if possible. Seeing that the master branch has not changed since you started the add-countries branch, Git has decided it is simpler to just put the commits of the add-countries branch in front of the master branch, without going into the trouble of creating an extra merge commit.
It is possible to force Git to create a merge commit even if fast forwarding is possible.
SourceTree
Tick the box shown below when you merge a branch:

CLI
Use the --no-ff switch (short for no fast forward):
git merge --no-ff add-countries
Pushing a branch to a remote repo
Here's how to push a branch to a remote repo:
SourceTree
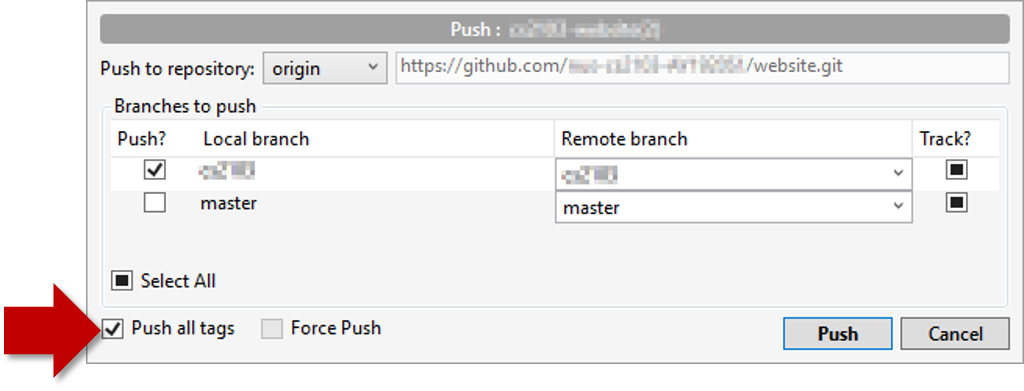
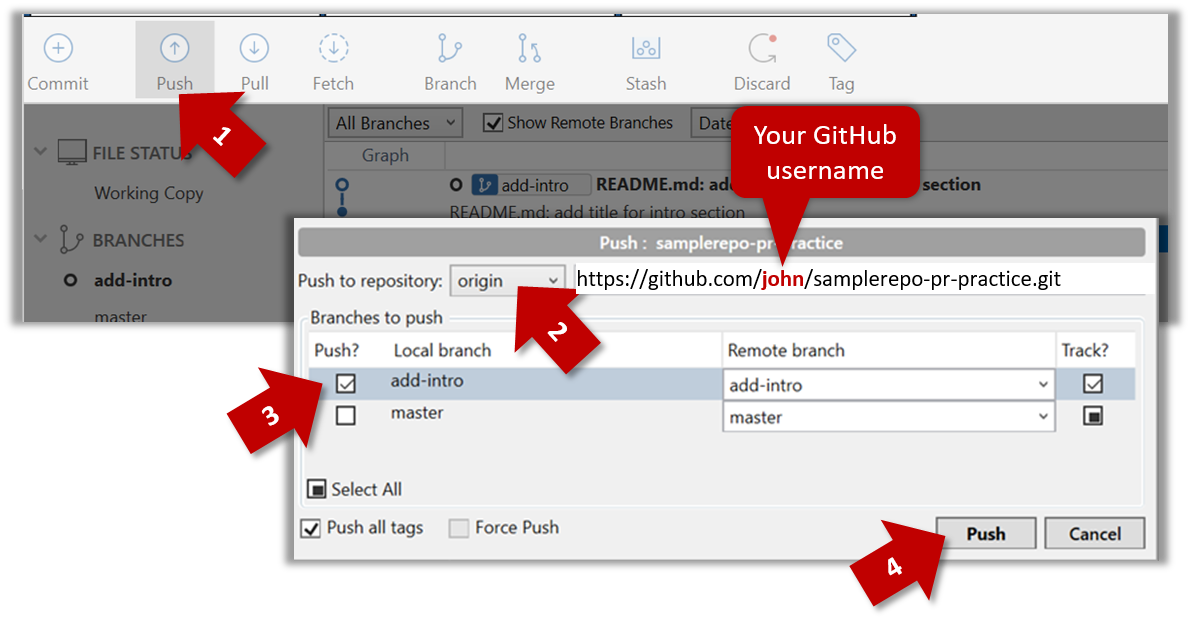
Here's how to push a branch named add-intro to your own fork of a repo named samplerepo-pr-practice:
 CLI
CLI
Normally: git push {remote repository} {branch}. Examples:
git push origin master pushes the master branch to the repo named origin (i.e., the repo you cloned from)git push upstream-repo add-intro pushes the add-intro branch to the repo named upstream-repo
If pushing a branch you created locally to the remote for the first time, add the -u flag to get the local branch to track the new upstream branch:
e.g., git push -u origin add-intro
See git-scm.com/docs/git-push for details of the push command.


